In October 2018, I took LarryLudwig.com 100% sitewide HTTPS/SSL. The site runs on WordPress, and while there were a couple of quality WordPress SSL tutorials out there, there wasn’t a complete start to finish guide.
So this is how to set up HTTPS / SSL for WordPress based on my experience as a marketer & non-server admin. I’ve updated the guide for lessons learned.
What is HTTPS / SSL?
Let’s start with a couple of definitions.
SSL is short for “Secure Sockets Layer” and is the standard security technology for establishing an encrypted link between a web server and a browser.
HTTPS is the URI scheme that tells a browser to use SSL to fetch the files. In other words, SSL is what your browser uses to serve a web page over HTTPS.
The HTTPS connection ensures that the only parties that can see the information being passed are the browser & the server.
In the physical world, it would be like 2 people walking into a vault and exchanging information instead of exchanging information out in public.
The actual mechanics of HTTPS are complicated (but interesting) but if you are running a website, the most important thing to know is that to serve a page via HTTPS – every file request must be encrypted or the connection is not secure.
The main challenge in moving your website to HTTPS is ensuring that everything is served over HTTPS. Otherwise it’s nearly pointless.
Why Go HTTPS Sitewide?
Many eCommerce website owners are familiar with making their checkout pages SSL since they are required by credit card processors to encrypt all information.
But moving your entire website (not just checkout pages) is a fairly new best practice.
Every website has good (& bad) reasons for going HTTPS sitewide. Here are my considerations –
Positive Considerations of Going SSL
- My site is used as intended – If someone is going to come to my website, I don’t want a hotel Wi-Fi system or some toolbar defining their experience.
- More user credibility – The Internet is littered with the websites of spam-hustlers. An SSL is a good way to signal to readers that “yes, this is an established, legitimate, ongoing business.” The green lock is recognized & fairly powerful.
- The Future of The Internet – The powers that be of the Internet have made HTTPS standard. If you are not HTTPS, then you get a nasty red warning from most major browsers.
- The Future of Your Website – If I ever wanted to accept payments or encrypted information, those pages would need to be SSL. Going sitewide SSL will make future expansion easier. Building a new site architecture & going SSL would be a lot of balls in the air.
- Google Organic Boost – I don’t think this ranking factor has as much weight as promised, but it is a best practice. Google has said that they see HTTPS as a quality signal in their algorithm.
- Nerd cred – Going SSL is still daunting enough that doing it yourself warrants a small Nerd Gold Star.
Negative Considerations of Going SSL
- Cost* – Basic SSL certificates are fairly cheap. Extended Validation certificates are pricier. Both need to be renewed every year. And both require an investment in time to implement. Since HTTPS is not required unless you accept encrypted information, HTTPS is technically an unnecessary cost.
- Technical Hurdles – Implementing SSL is straightforward but will have awkward obstacles along the way. These can create annoying bugs at best (I temporarily lost Event Tracking in the process) and make you temporarily lose access to your site at the worst.
- Unknown return – Since SSL is an unnecessary cost, you should be implementing it as an investment. However, there are few studies that I’ve seen that conclusively show that implementing SSL alone generates a high return on investment. Even in terms of organic traffic, few SEOs have demonstrated a significant boost in organic traffic from HTTPS/SSL.
*In fairness, many hosting companies are now bundling SSL certificates with their plans. WP Engine and SiteGround bundle a free LetsEncrypt SSL and InMotion recently rolled out free Comodo SSLs for all hosting plans.
Once you’ve balanced all the considerations, here’s how to go HTTPS with SSL.
How To Setup HTTPS / SSL for WordPress
Step 1: Plan & Prep Your Website
To make the switch to HTTPS/SSL without any errors or major drops in traffic, there are a few things to take care of before you even purchase your SSL.
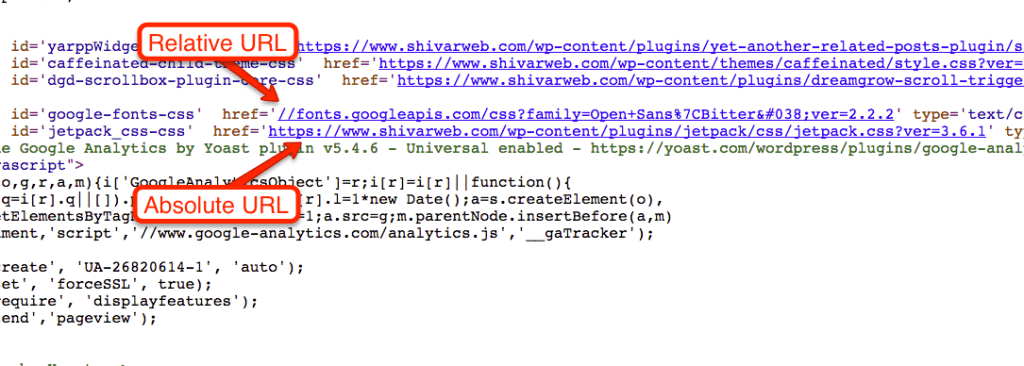
Look at your page source to identify files that are not loaded over relative URLs. These usually include image files, scripts, video embeds & 3rd party CSS. I’d also include internal links.
Switch all these file paths temporarily to relative URLs. Depending on the size of your site & your technical confidence, this can mean:
- Manually editing each page
- Hiring a VA to comb through your site making the edits
- Hiring a WordPress developer to run find and replace in your database
- Running a WordPress find and replace plugin
Next, I would understand how search engines are going to re-crawl your site. Migrating to HTTPS is like migrating to a new site – all traffic & bots need to be permanently redirected to your new URL.
The good news with HTTPS migration is that the insecure & secure versions of your site can co-exist. However, for user experience & duplicate content risk, it’s best to keep the transition short.
Migrating all your internal links to relative URLs will help the process. Instead of users/bots passing through a redirect, they will go directly to the page served on whichever connection they are currently on.
Relative URLs are not WordPress’ default functionality (and shouldn’t be your permanent solution either). In fact, I broke my event tracking since the Google Analytics by Yoast plugin only identifies full URLs.
After you complete the migration, you can go back to using full URLs within links & images. But during the transition, you have to use relative URLs since attempting to serve secure content over an insecure connection generates browser warnings. And attempting to serve insecure content over a secure connection removes your HTTPS and creates redirects for users.
Other items that you can identify before the transition are –
- Any policies your hosting company has about SSLs.
- How your hosting plan works with SSLs. If you are on a shared hosting plan, I’d recommend migrating to a VPS server before considering SSL. In fact, if you are attempting to go HTTPS/SSL on a shared server, you should stop reading & go talk to your hosting company. Any certificate will need to be a shared certificate for the server, which complicates things a bit.
- Your FTP details to log in to your server & make edits.
- A copy of TextEdit, Notepad or TextWrangler set to Plain Text UTF-8.
Step 2: Get Your SSL
Now you have to actually buy your SSL. There are dozens of types of SSL certificates. And hundreds of SSL sellers. It’s a very confusing marketplace.
However, there’s only a handful of companies that hold Certificate Authority. All SSL certificates are either sold directly by them or are resold by a retailer.
I originally got my Comodo Extended Validation SSL from Namecheap. I’m a Namecheap fan – it’s where I get my domain names. Since SSLs are tied to a domain name anyway, and Namecheap resells them for the same price I could get directly from Comodo, it was a natural decision for me. I’ve since simply downgraded from Extended Validation due to the onerous verification every year (and the fact that my site does not accept any user-submitted information).
Purchasing & managing my SSL with Namecheap made sense for me. You can check out their SSL prices here.
You can get your SSL from pretty much anyone (err, not everyone) but Hover does a good job too along with other registrars in addition to your hosting company. However, be sure to make your choice on the type of certificate, customer support & product management NOT necessarily on price.
Everybody is reselling the same thing, so if you go with one company because they are cheaper than another, then there’s something up with what you’re buying.
And that’s why it’s key to understand what exactly you’re buying.
Weigh SSL Categories & Considerations
Every SSL has 2 attributes – domain use & validation level. Each of those attributes has 3 basic choices.
Domain Use
Single domain – This means you can use the SSL on a single subdomain. This is also the only option that can be paired with Extended Validation.
Wildcard domain – This means that you can use the same SSL on all subdomains of a single domain. This is useful if you have content on a Content Distribution Network (CDN) or any subdomains. I bought one of these for my CDN.
Multiple domain – This certificate uses a technology called Server Name Identification to secure multiple domains. It’s the option offered by most hosting companies. It is also not supported by older versions of Internet Explorer or by the BingBot. Be sure to balance convenience with those considerations. It’s the reason that I went with a 3rd party SSL.
Validation Level
Domain validation – You have to prove that the same person that runs your server also owns the domain. These are cheap and quickly issued. You get a basic green lock in browsers.
Organization validation – You have to provide 3rd party support that you or your organization exists. You get a basic green lock in browsers.
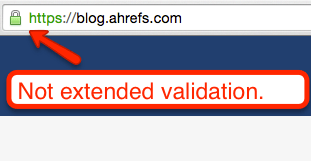
Extended validation – You have to do all the validation of domain & organization in addition to providing government documentation & having consistent Name, Address & Phone Number across business data providers. You can only use these on a single domain. These can take several days or more to issue and are quite expensive. Mine took a week with some back and forth on my business data. They also have to be renewed every year with the same process. As a reward, you get the conspicuous green bar with a lock on browsers.
Namecheap has all the options listed by type & brand here.
Purchase & Activate Your SSL
Once you’ve decided which SSL is right for you, go ahead and purchase it. If you decided to get a shared SSL through your hosting company, you can skip this next section.
For this site, I bought a Comodo Extended Validation from Namecheap for larryludwig.com and a wildcard subdomain SSL for use with larryludwig.com & other subdomains.
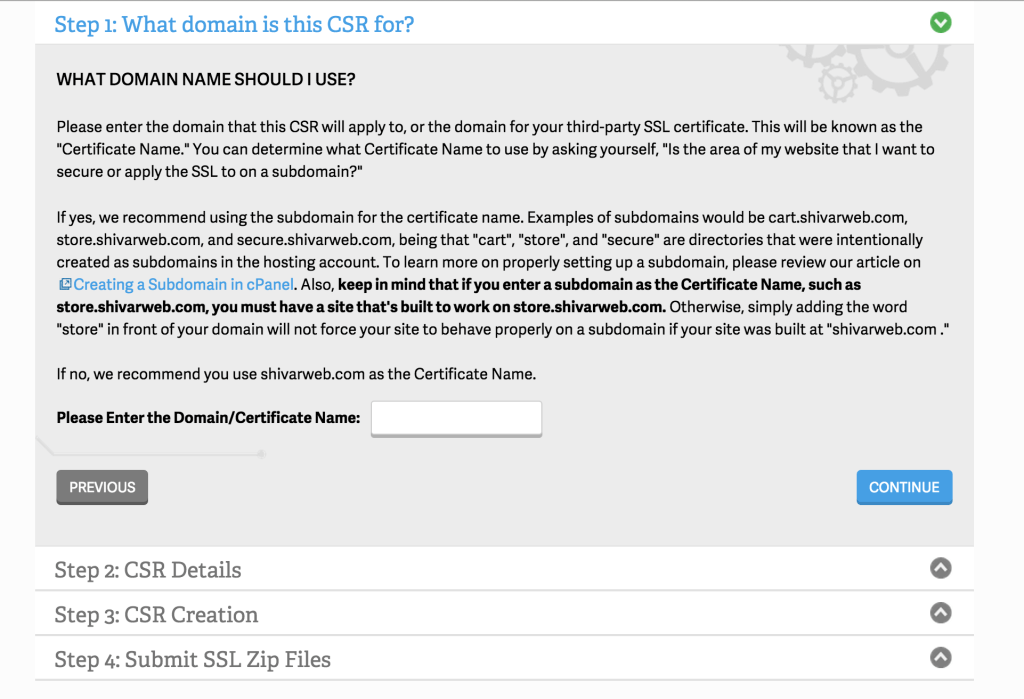
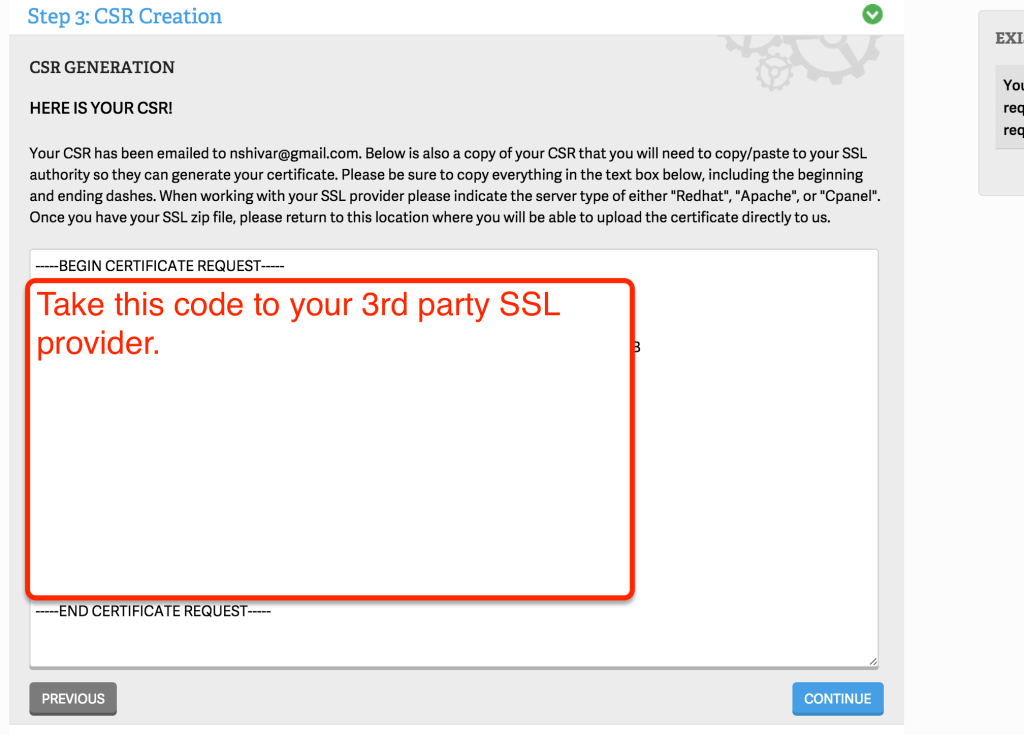
To activate it, you need to go generate a Certificate Signing Request (CSR) from your server. You can contact support, look for the option within your account management panel, or navigate to your cPanel.
For each CSR, if you are going HTTPS sitewide, be sure to put the correct root domain (ie, no www) – not subdomain.
Once you’ve generated the CSR, go back to your SSL registrar and paste in your CSR to activate it.
You’ll then begin the verification process. If you’re getting an Extended Validation certificate, you’ll be contacted by the Issuer for copies of your business information. If you got a Domain Validation certificate, you’ll be issued the documents in minutes.
Once issued, your SSL will consist of a couple of files in a ZIP file.
Step 3: Install SSL on Your Server
To install the SSL on your server, you can often contact your hosting support team. InMotion installed mine for $25 in minutes.
You can also install it via cPanel yourself.
InMotion Hosting has a full tutorial on installing your SSL via cPanel.
Once it’s installed, you can run your domain through SSL Labs to verify that it’s installed correctly.
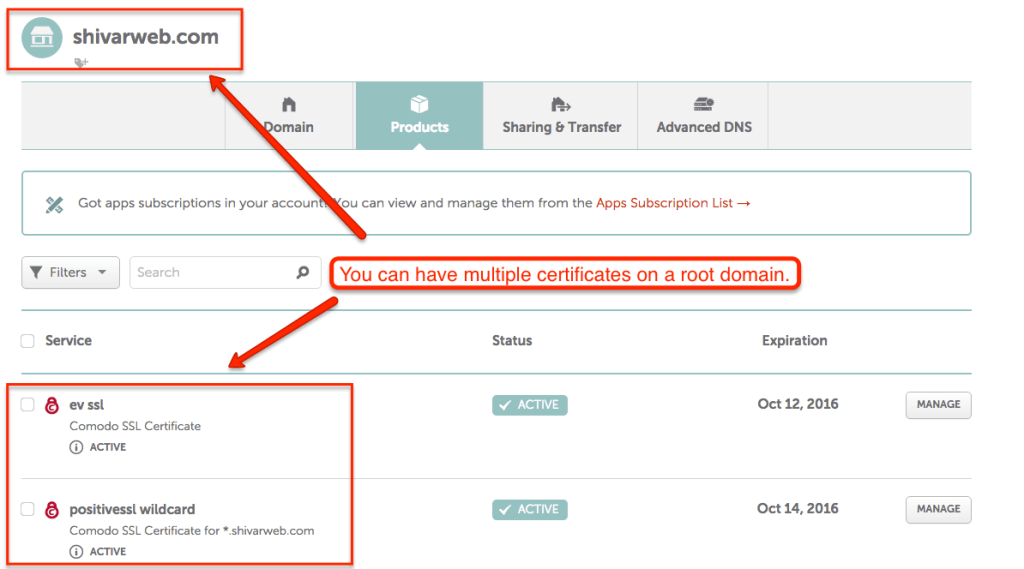
*note – you can have multiple SSLs installed on a single server. In my case, I installed both the Wildcard and the Extended Validation Certificate.
If they are correctly installed, you should be able to access your website via both HTTPS and HTTP.
Try them both in your browser address bar.
If anything loads over the HTTPS connection, you are good to go to the next section.
Step 4: Make WordPress Admin SSL
WordPress’ administration area is set up to handle SSL. It makes sense to get it set up first.
Login to your server via FTP and open the wp-config.php file in your root folder.
[php]define('FORCE_SSL_ADMIN', true);[/php]Type in https://[yoursite.com]/wp-admin and see if it loads over HTTPS.
If that URL does not load over HTTPS, remove the line from your wp-config.php immediately. There’s something to troubleshoot.
If successful, then go ahead and log in. Look for the green bar in the admin area.
Step 5: Make One (1) URL SSL & Remove Errors
The next step is to get your themes, plugins & front-end working well. Install the WordPress SSL plugin. It will allow you to force SSL for a single page (and troubleshoot w/o interrupting users on other pages).
*note – there’s an “outdated” plugin warning, but it worked fine for my recent install on WordPress 4.3
Once you install the plugin, navigate to a test page with a typical template and Force SSL. Load the page in Chrome browser.
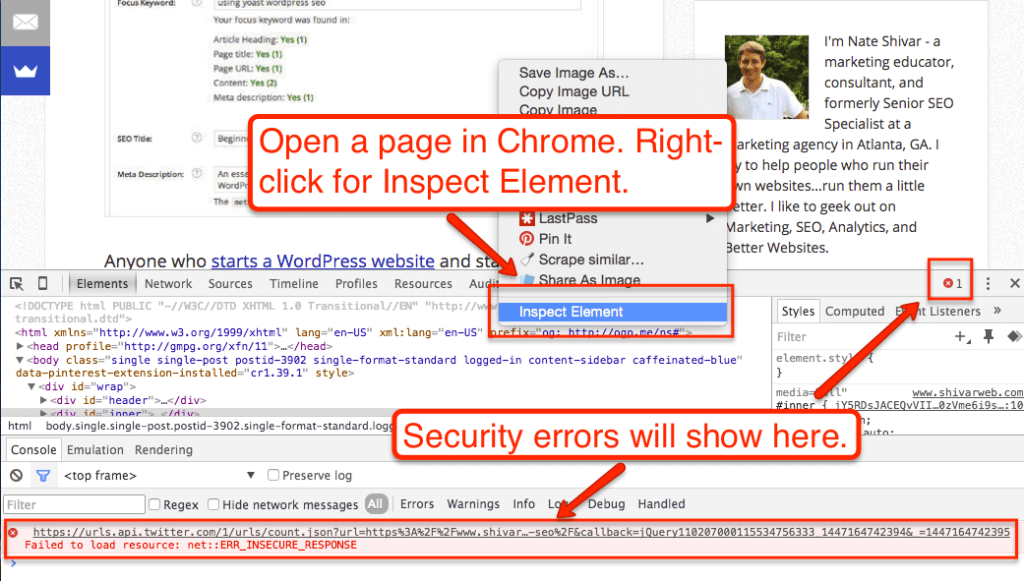
Use Inspect Element to find insecure elements. Then navigate to your Dashboard and fix every single one. Be sure to check each type of page you have (ie, with all widgets, footers, headers, etc enabled).
Step 6: Finish Prepping Entire Website for Errors
Next, go to all your key pages in your browser. Try to load them over HTTPS (don’t force them via plugin, just type in the full URL with HTTPS).
Check inspect element and look for any images, video, scripts, etc that do not load or block an HTTPS connection.
Once your primary pages are all loading well over HTTPS, it’s time to force SSL across your entire website.
Step 6b (optional): Make CDN SSL
If you are using a CDN to serve files, that connection will need to be secure as well. Each CDN will have its own process.
My CDN – MaxCDN – has a lot of options. They’ve got everything from their premium EdgeSSL product (expensive) to using their free Shared SSL setup (where your content lives on their subdomain).
The path I chose based on cost, performance & SEO considerations was to use my own wildcard SSL on a custom subdomain. My only cost was the annual cost of the wildcard SSL. And the custom subdomain keeps everything hosted on the larryludwig.com domain. I used MaxCDN’s SNI option.
*note – you still have to install the SSL on your server. You’ll just take the certificate information and your server’s private key and paste it into MaxCDN.
Step 7: Force SSL everywhere & Update WordPress Settings
Open up your root folder on your server with FTP (or SSH). Navigate to & open your .htaccess file.
*Note – your .htaccess file governs access to your server. Copy and paste very carefully. If you mess up, your site is going down.
Paste the following near the end of your .htaccess file:
[code]# Force HTTPS RewriteEngine On
RewriteCond %{HTTPS} off
RewriteRule (.*) https://%{HTTP_HOST}%{REQUEST_URI} [R=301,L][/code]
Save & upload changes. Immediately test your website. Type in the HTTP version of the URL and see if it redirects to the HTTPS version.
Once that is in place, log back into the WordPress Admin and navigate to General Settings.
Change both the WordPress Address & Site Address to HTTPS URLs.
Your plugins, images, etc in WordPress will now by default use https:// in their full URLs.
You can also uninstall the WordPress SSL plugin. It’s redundant.
Step 7a: Switch Over Services
Since your site has migrated, you need to migrate the URLs of any 3rd Party services. Here are the most common.
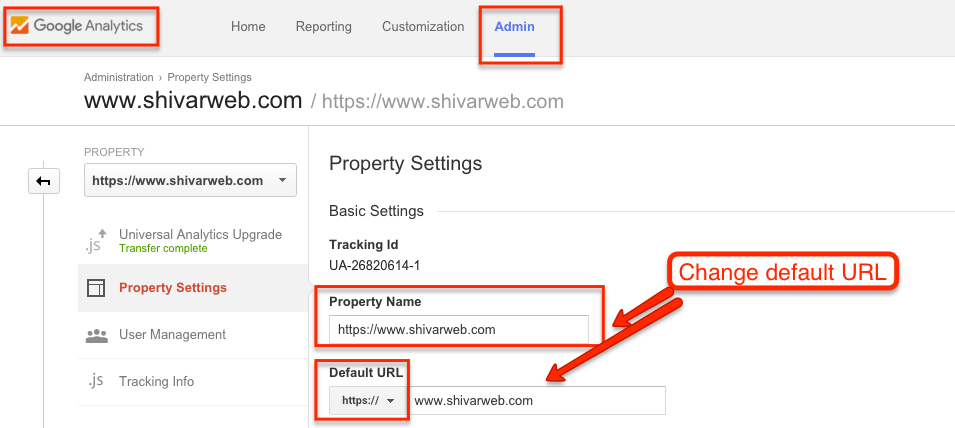
Google Analytics
Navigate to the Admin section of Analytics.
Select Property Settings and look for Property Name & Default URL.
Switch both to HTTPS.
Google Search Console
Navigate to Google Search Console.
Add a new property with the HTTPS version of your site.
You should be able to use the same verification process as the HTTP version.
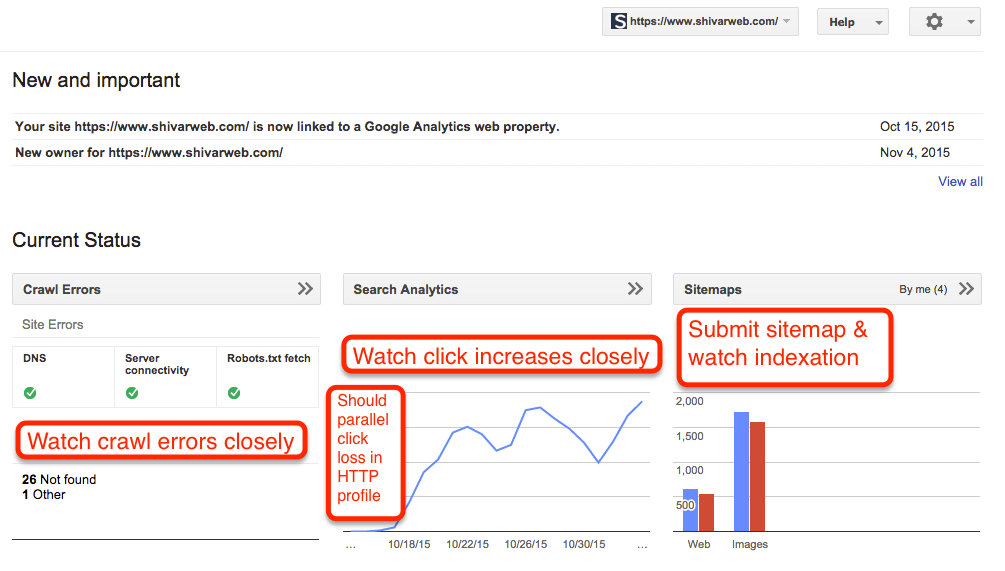
Submit your new HTTPS sitemap.
Go back to your HTTP profile. Go to Settings and submit a Change of Address.
Closely monitor the decline in clicks/indexation of the HTTP version and the parallel increases for the HTTPS property.
MailChimp / Email Providers
Navigate to your campaigns and switch everything to the HTTPS version.
All Other Profiles
For any links that you control, be sure to switch them to point directly to the HTTPS version of your website. It prevents users & search bots from passing through a redirect.
Think local business listings, social profiles, etc.
Step 8: Ongoing Maintenance
Run your site through SSL Labs’s testing tool to receive a security grade.
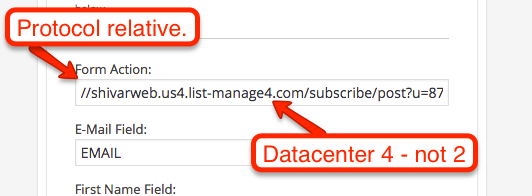
You’ll need to continue to audit your site for insecure content. Whenever you are pasting code from 3rd Party sites (e.g., YouTube embeds), make sure it is either via HTTPS or protocol-relative.
One of the trickier pieces of code I’ve run into is my MailChimp subscription box. It has to be changed to a certain data center to serve over HTTPS.
If you have a large site, I recommend checking out Screaming Frog which is a crawler, typically used by SEOs, but also useful for crawling for insecure content.
Whenever you publish new content, always look for the green lock.
Good luck!
Immediate Next Steps
- Share this if you found it useful
- Check out all the SSL options on Namecheap or your hosting provider (like InMotion)
- Decide if SSL is right for you right now
- Dive into Step 1!


