This is part of the Beginner’s Guide To WordPress Series and covers how to use the WordPress Dashboard, changing your password, and a few of the initial settings – you know the type of stuff you need to know only when you need it.
The Dashboard is what you see right off the bat after installing WordPress and logging into your new website. It’s also known as the ‘backend’ of your website.
You’ll control everything about your WordPress-powered website from the Dashboard.
Here’s a quick orientation to what the WordPress Dashboard is, how to use the WordPress Dashboard, what the Admin Bar is, how to change your password, and what changes to make immediately upon setup.
The WordPress Dashboard
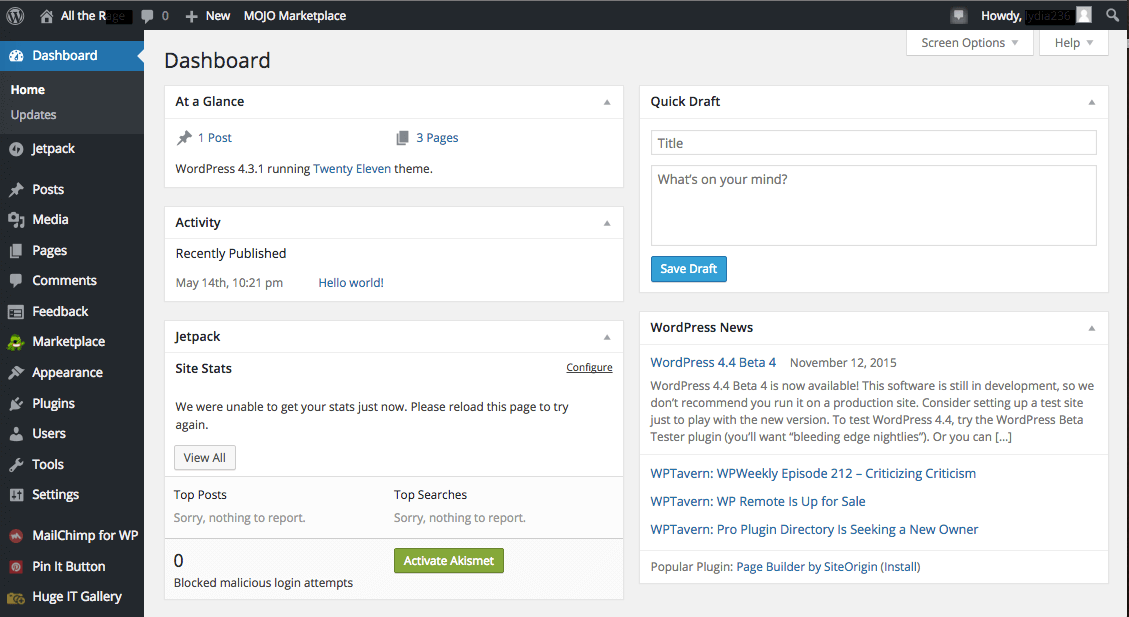
As I mentioned, the Dashboard is typically the first thing you see when you log in. It’s a great way to get updates on your website, statistics, and more.
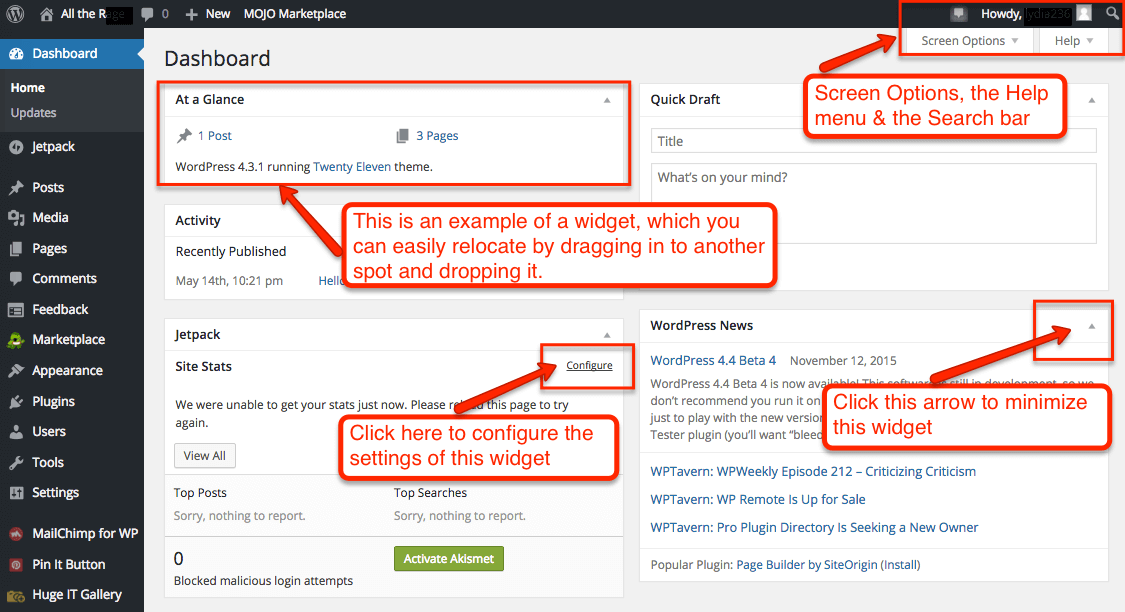
In the main area of your website, you will find widgets that provide news and basic information about your site. You can drag and drop these widgets to position them however you would like. You can also roll them up by clicking the down arrow icon in the far right corner of the widget title. Some widgets have configuration options that you can access by hovering over the title bar and clicking on the configure link that appears.
Now let’s look at the upper right-hand corner. You will see a couple of pull-down tabs labeled Screen Options and Help. Clicking on the Screen Options tab brings up customization options for your dashboard. Here, you can turn on/off the widgets you want to have shown/hidden at any given time. The Help tab provides some information about these customizations as well as some helpful links to documentation and support.
Moving over to the sidebar, you will find buttons that provide easy access to different areas of your website. When the menu item is selected, a list of sub-menu items will appear below it. Hovering your mouse over any of these buttons will also display the sub-menu. You can click these to easily access any of the subsections of your site.
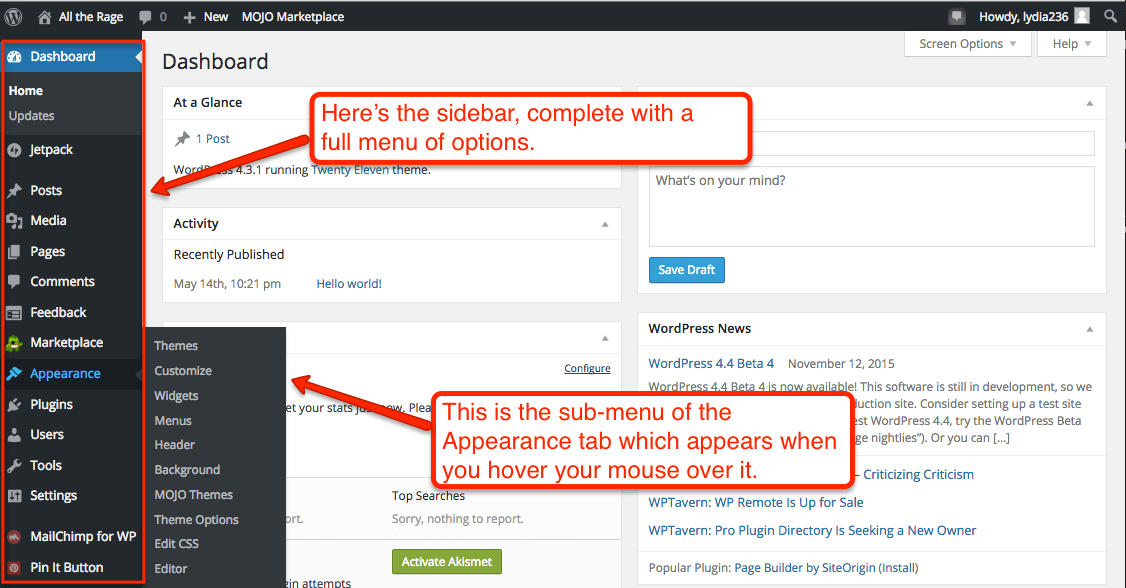
The main menu items include:
Dashboard – where you can receive updates and statistics regarding your website.
Posts – where you create and manage the posts on your blog as well as the managing tags and categories.
Media – for managing the media content library (things like images, video, and audio).
Pages – for creating and managing pages on your site.
Comments – used to manage your visitors’ feedback.
Appearance – used to change your WordPress theme, set up widgets, create custom navigation menus, and more.
Plugins – give you the power to extend the capabilities of your website and allow you to manage, activate, and deactivate them. There are thousands of plugins to choose from, I list the best WordPress plugins available.
Users – allows you to manage and view all of the site’s users. It also allows you to edit your own profile, giving you options to change your password, email address, and screen name.
Tools – provides some powerful tools plus options for importing and exporting content.
Settings – where a bulk of your site’s options are maintained (like your website’s name, privacy, and permalink settings).
Admin Bar – located at the very top of the page; it provides access to commonly used features and information.
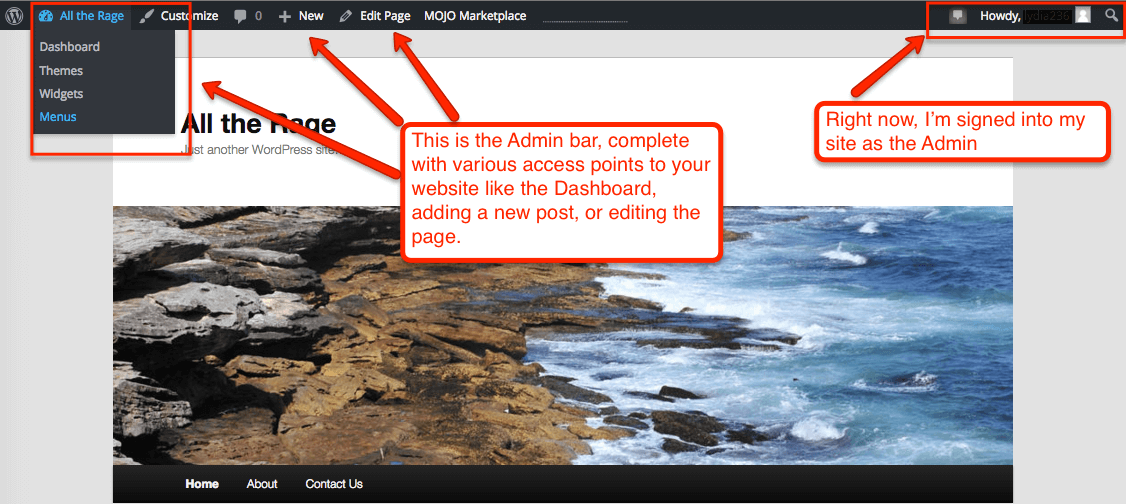
Admin Bar
If you are logged in as the admin of your site, you will see a gray bar at the top of your screen. This is called the “Admin Bar” and it is only visible to anyone who is logged in. It provides various options and easy access to your site. When logged in as Admin, the Admin bar will have several different items.
The WordPress icon that contains information about WordPress along with support and contact forums.
If you have multiple sites on a network, you can access them under My Sites, which will give you some quick links that will take you to the dashboard for that site, as well as the new post page, comments, and the site itself.
Next to My Sites is the site you are currently on along with similar options to help you quickly navigate your site. For example, the Word Bubble icon takes you directly to the Comments page for the current blog and shows you the number of pending comments that need to be approved.
The Add New icon takes you to the corresponding page in the list below to add or create new items.
Your profile name and avatar icon are on the right end of the Admin bar. From here you can either edit your profile or log out. And lastly, there will be a Search icon that allows you to search for any post or page on your site.
Changing Your Password
If you ever need to change your password, navigate to your profile by going to Users and then Your Profile. At the bottom of the page, you will see a place to enter your new password and another box to confirm it. There is a strength indicator that helps you create stronger passwords if you wish to use it.
When you are done, click Update Profile and your old password will be replaced.
Settings to Change Immediately After Setup
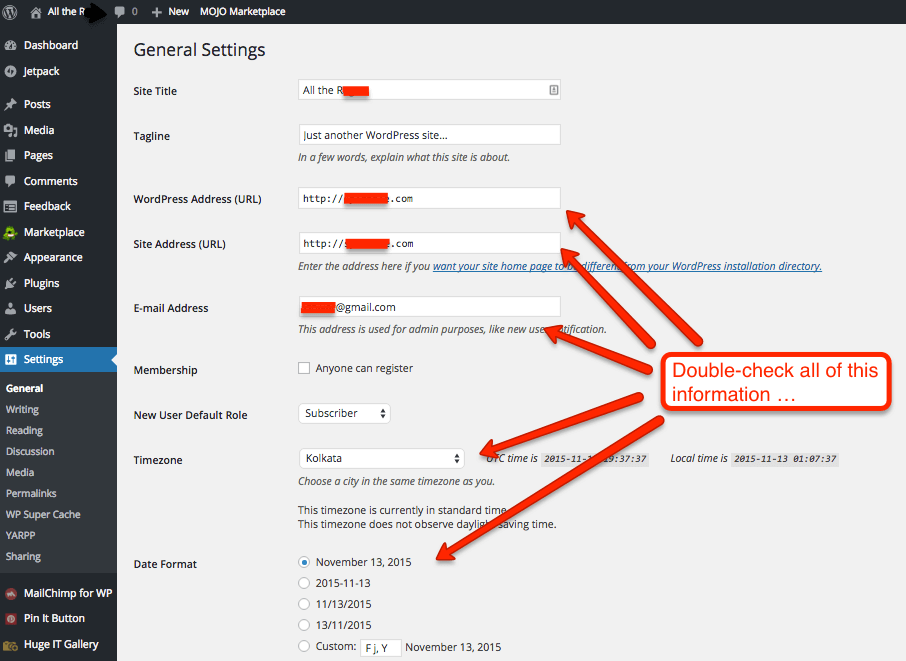
First, you’ll want to navigate to Settings, then General. Verify that your time zone, email, & other pertinent information is correct. If you want your own www address instead of one that has WordPress dot com attached – change the Site URL and WordPress URL to [http://www.yourdomain.com]. Click Save.
Second, navigate down to Settings, then Permalinks. This page determines how your blog posts and page addresses look. Choose whichever structure you prefer.
Note – whenever installing plugins that create new categories or addresses (such as /products for eCommerce), this is where you will come to just click Save to reset permalinks.
Third, navigate to Settings, then Privacy. If you want good SEO – be sure that this is “allow search engines” checked. Don’t forget to save it!
Fourth, go to Settings, followed by Discussion. The defaults here are usually good, but this is where you control the comments settings if you want to add restrictions or make changes.
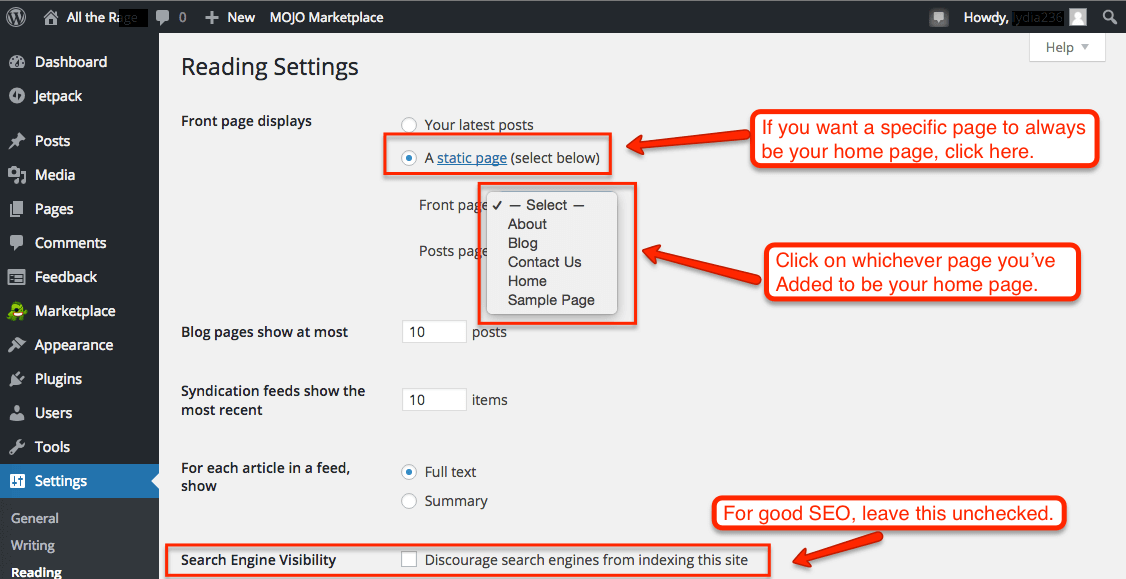
Fifth, find the Reading tab under Settings. Here you’ll need to choose how many blog posts you want to show on the page and whether you want a specific home page or for the blog to show up.
If you want to create a homepage, go to Pages and Add New. You’ll need to create a Home page and a Blog Page, saving them as you go. You can always go back to edit them later. Now, go back to Settings and then Reading. Select Static page, and select the Home page as Front and Blog as the Posts page. Click save!
Next Steps
At this point, you’re good to go with basic settings. Onward to bigger and better things! Check out the posts below for your next steps.
- How To Use The WordPress Dashboard
- How To Create A Post In WordPress
- How To Create And Edit Pages In WordPress
- How To Use WordPress Categories And Tags
- How To Use The WordPress Visual Editor
- How To Add Images To The WordPress Media Library
- How To Add Images in WordPress
- How To Edit Menus In WordPress
- How To Add Widgets In WordPress
- How To Change A WordPress Theme
- How To Add A Plugin To WordPress
- How To Update WordPress
- The Best WordPress Plugins